Paid email newsletter guide
Creating a paid newsletter has never been easier. Get started quickly with our super-simple, in-house newsletter delivery service that's automatically included with our Pro and Premium plans — no additional fees!
If you'd like to send newsletters to both free and paid subscribers, check out our third-party email integrations: Campaign Monitor, ConvertKit, Drip, MailChimp, MailerLite, or Sailthru.
How to build a paid email newsletter
- Sign up for Memberful.
- Create your Plans.
- Add purchase links to your website.
- Create a members-only Post.
- Customize your branding.
- Send your members-only newsletter.
- Test the member experience.
- Go live.
Sign up for Memberful
To get started, sign up for Memberful. Once you're inside your Memberful dashboard, upgrade to the Pro plan from Account → Activate account.
The Pro plan, which is free while you're in test mode, is required to send out members-only email newsletters via Memberful or our email newsletter integrations.
Create your Plans
You'll want to set up some membership plans that people can subscribe to.
Log in to your Memberful dashboard, navigate to the Plans tab, and click New Plan. Fill in the details and settings for your plan and click Create Plan. Learn more about creating membership plans.
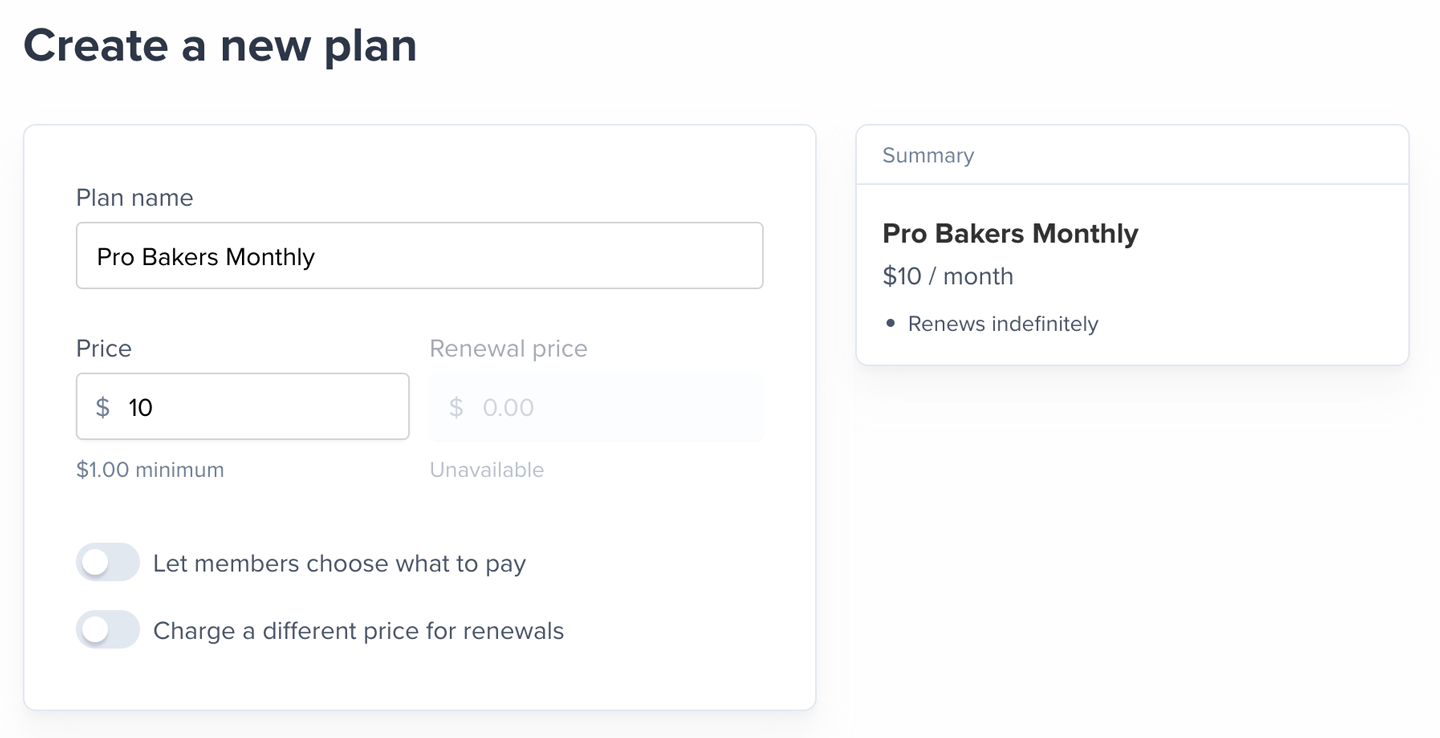
Thinking of selling multiple plans? Enable the upgrade / downgrade settings.
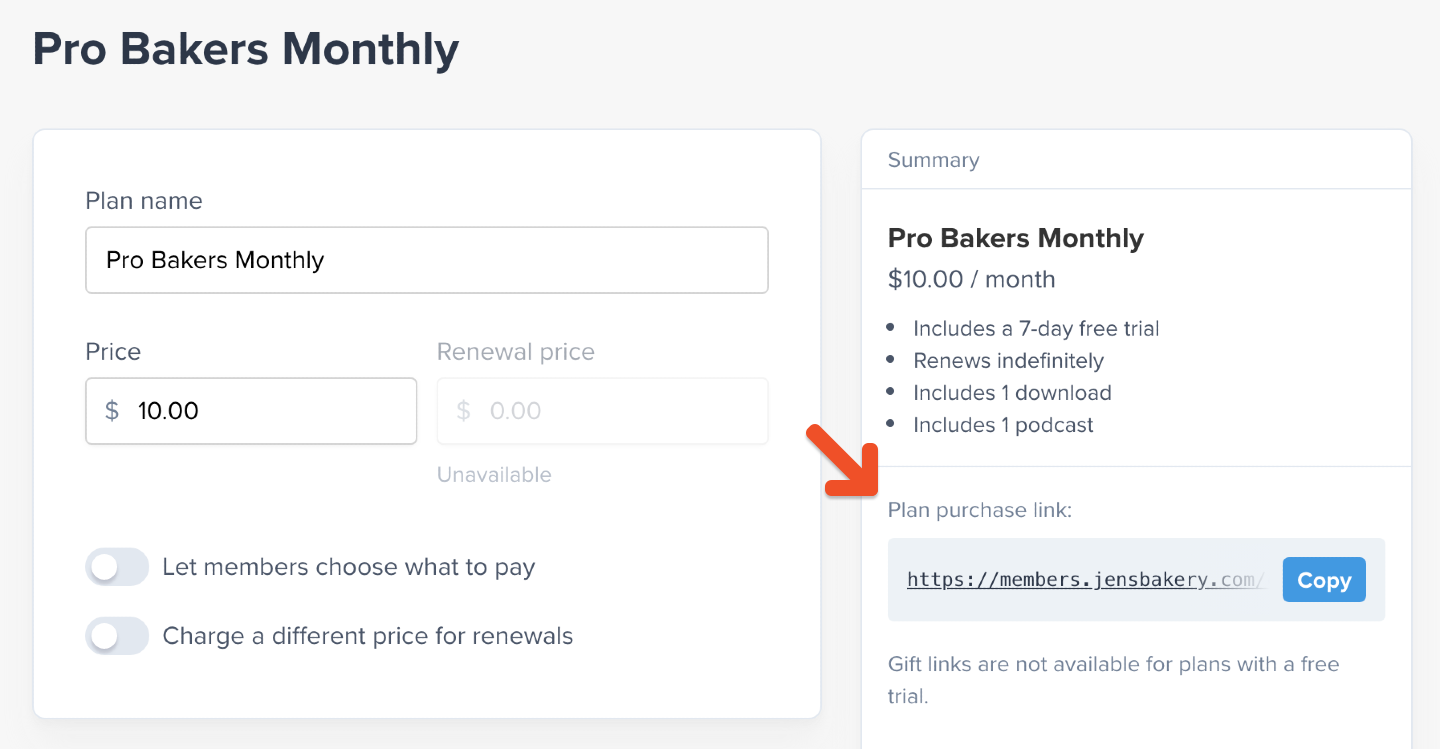
Add purchase links to your website
Copy the purchase link from the Plan Settings page in your Memberful dashboard and paste it on your website, or use the button options provided by your website builder. Learn more about adding purchase links to your site.
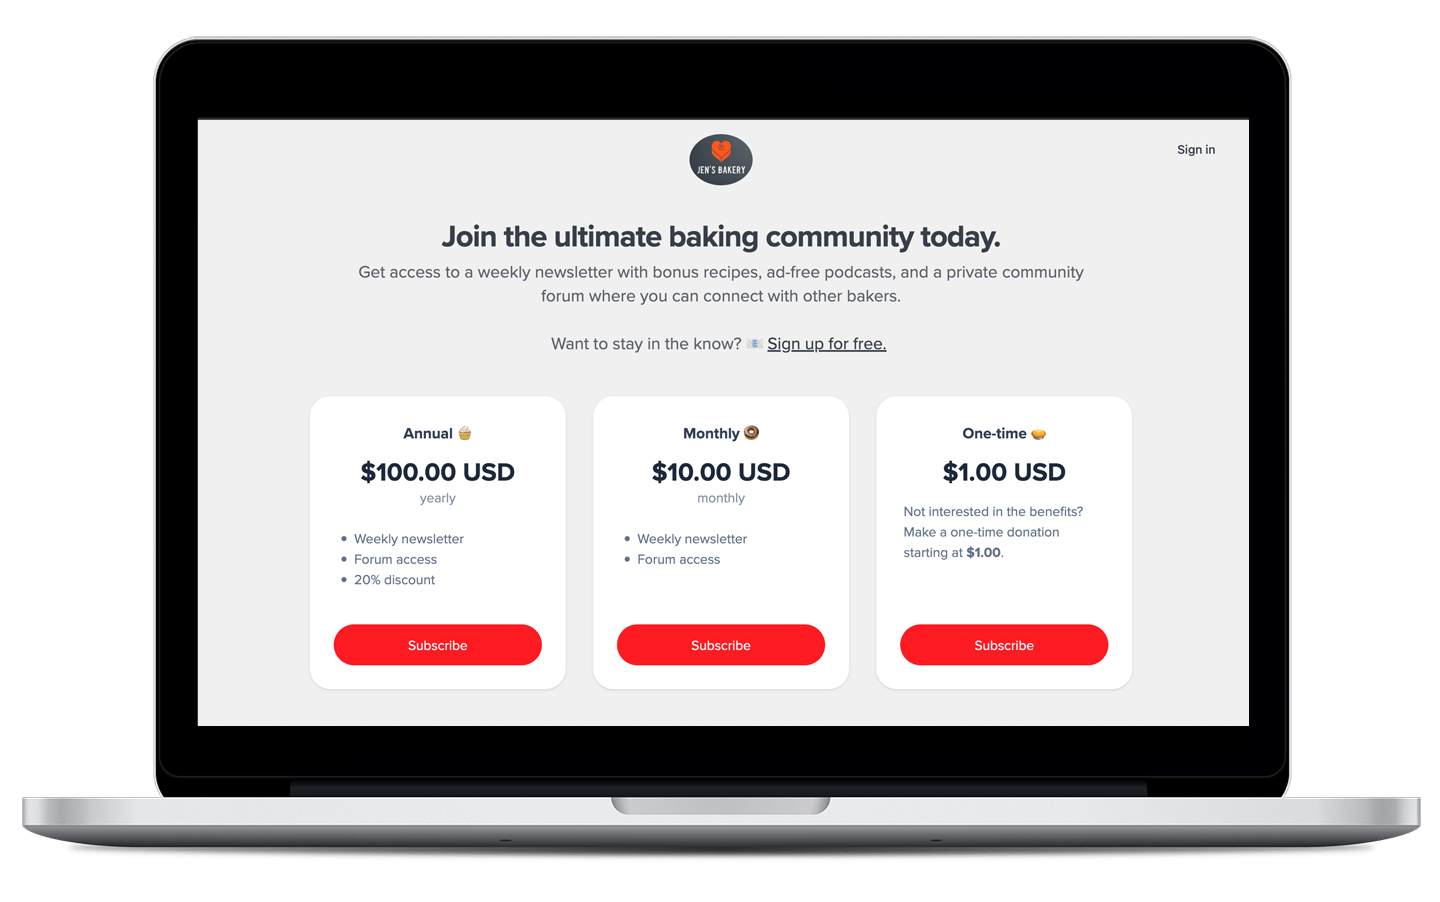
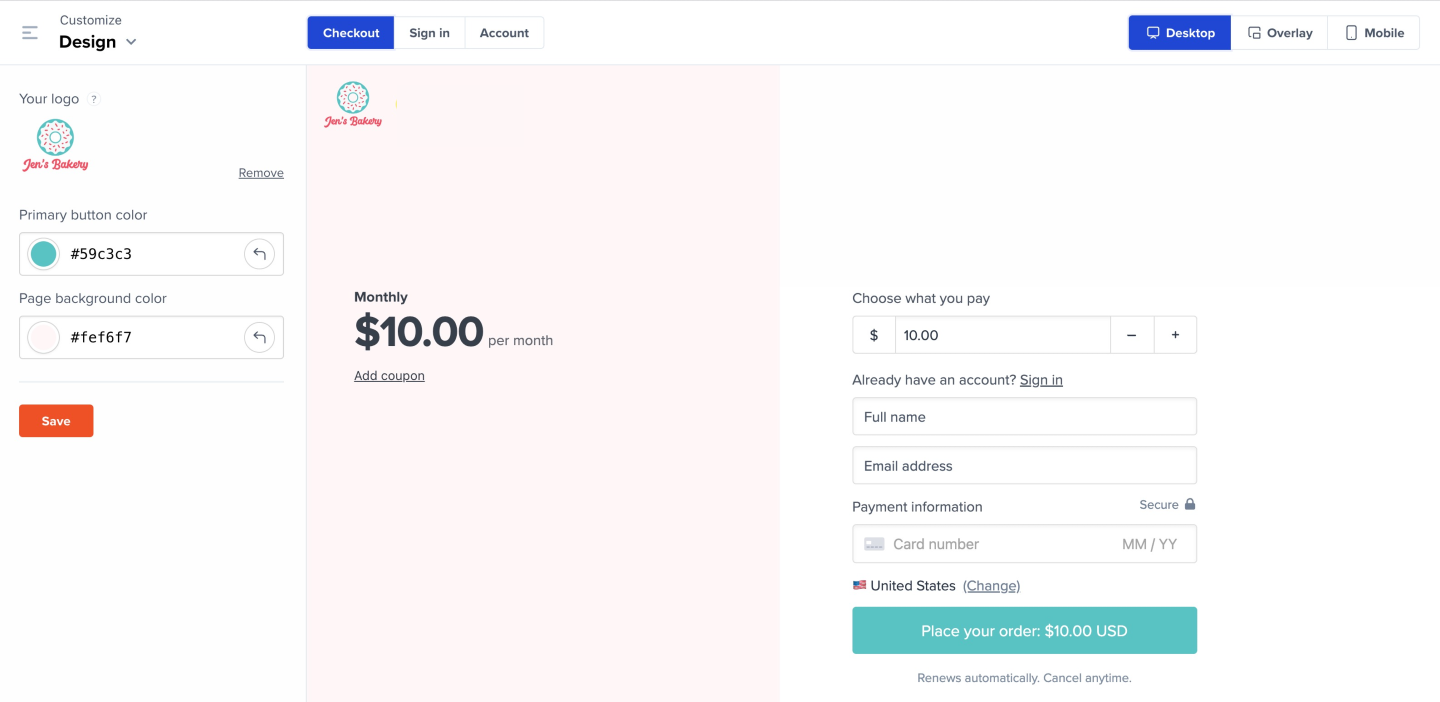
(Optional) Create a custom landing page
To sell memberships to your audience without a website, you can create a customized landing page hosted by Memberful by navigating to Customize → Landing page.
Use our powerful Visual Editor to add a title and description to the page, select which plans and downloads will appear on the page, customize their name and description, and add additional content like FAQs or testimonials. Your custom branding will be applied as well.
Learn more about creating a custom landing page.
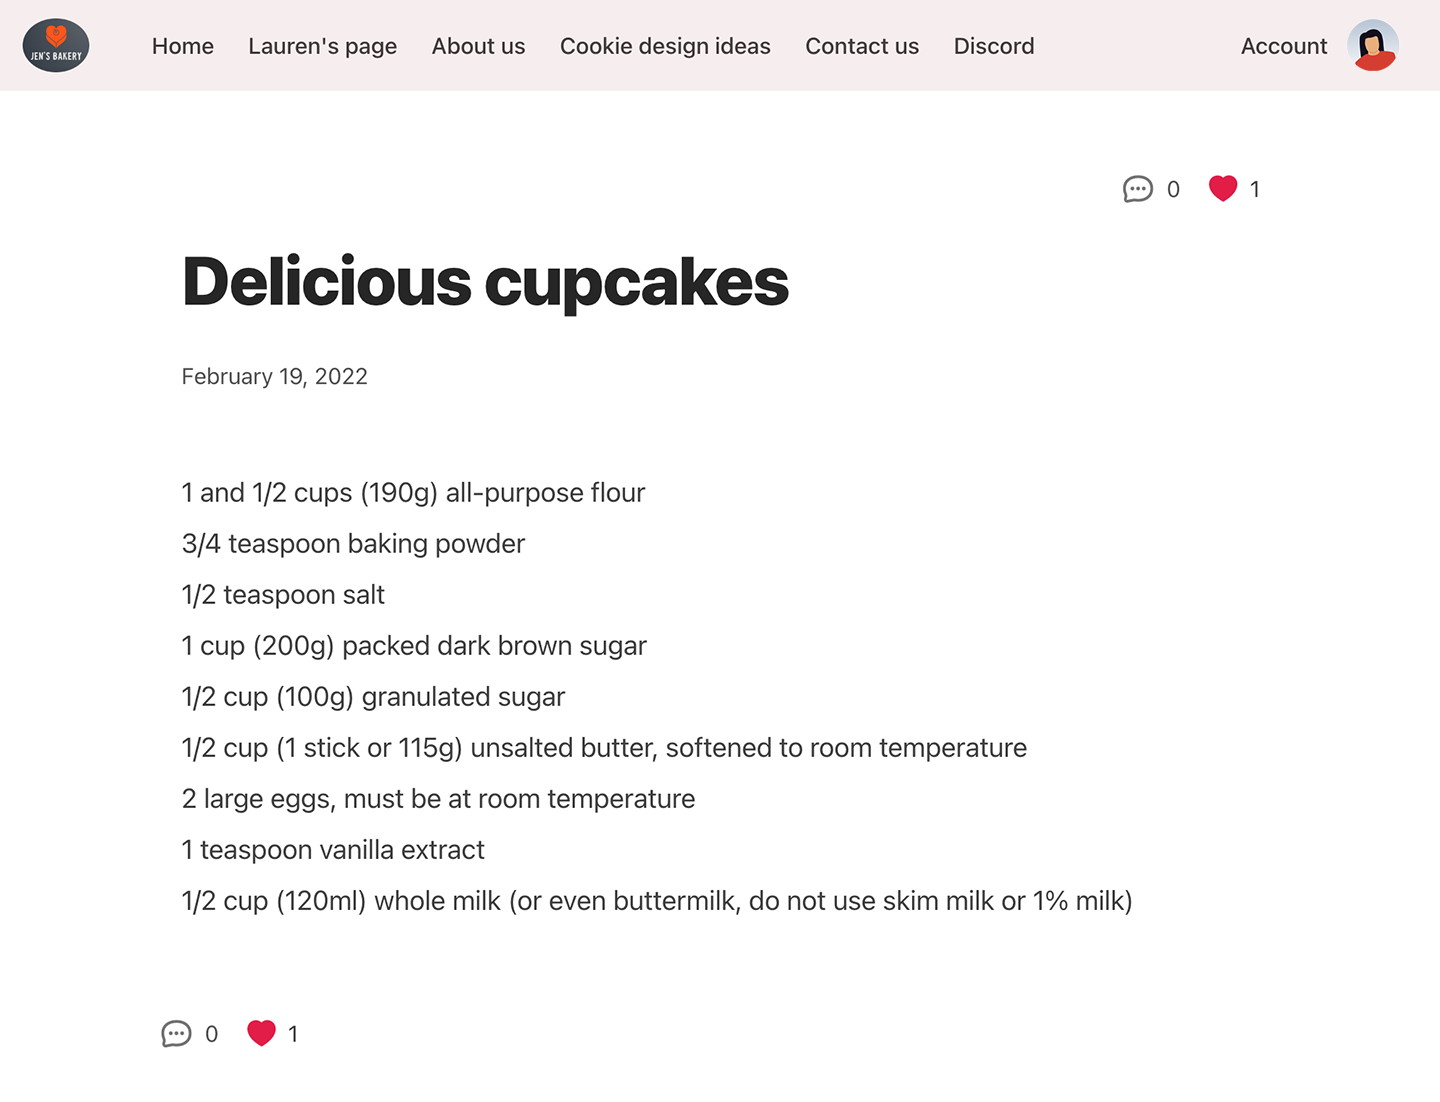
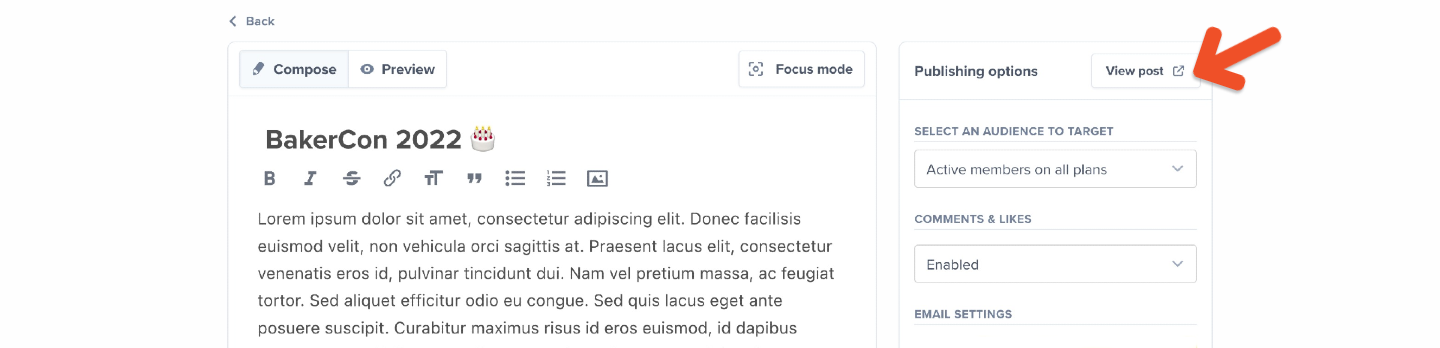
Create a members-only Post
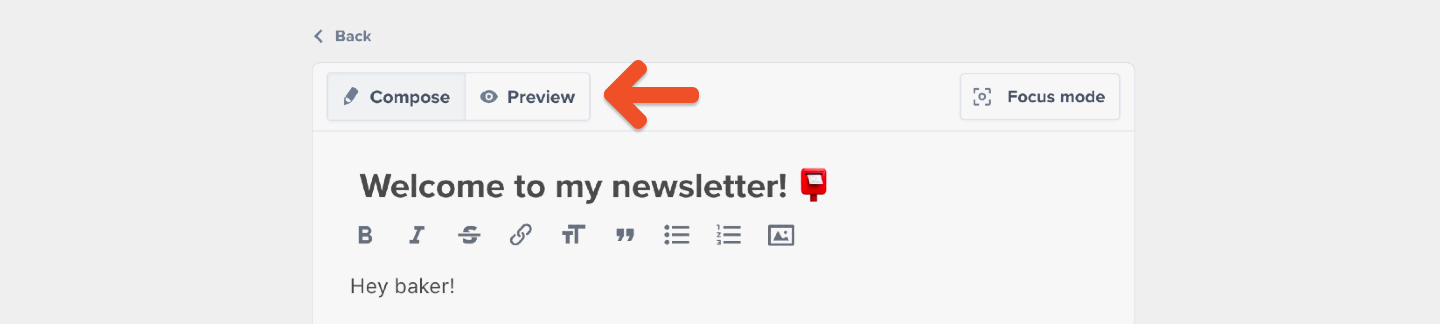
To create a newsletter Post, navigate to Content → Posts and click Create a Post.

Add a title and content for your Post. Use the icons at the top of the content editor to format your content and add elements like links and images.
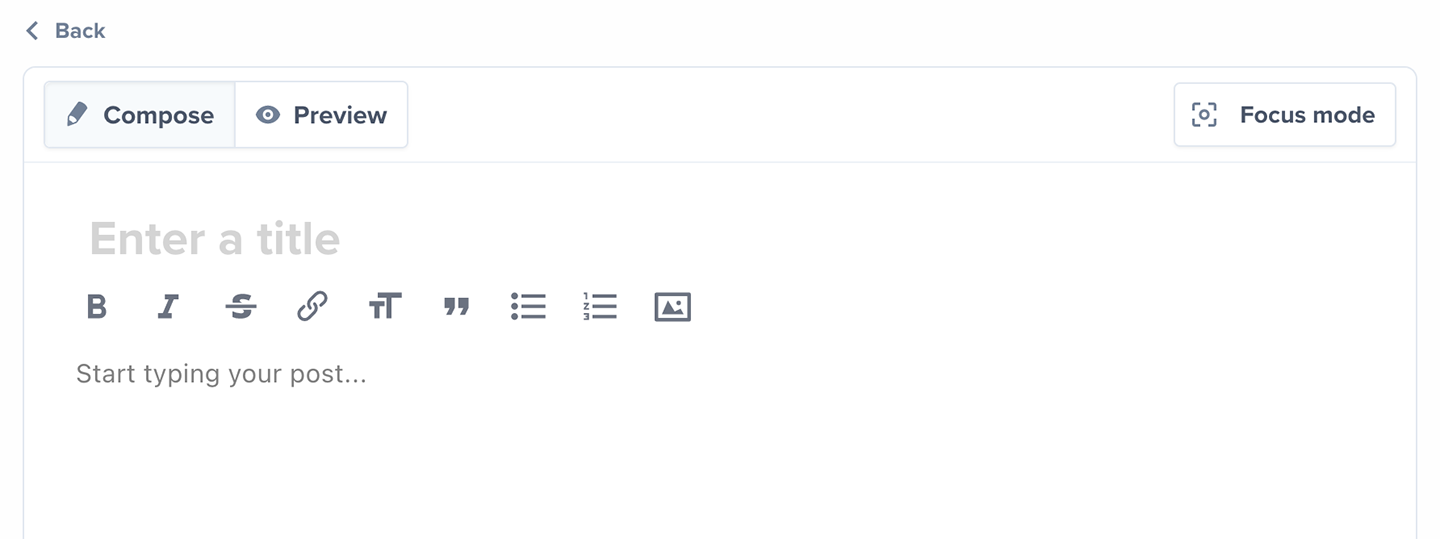
To see a preview of what this Post will look like to your members, click Preview.
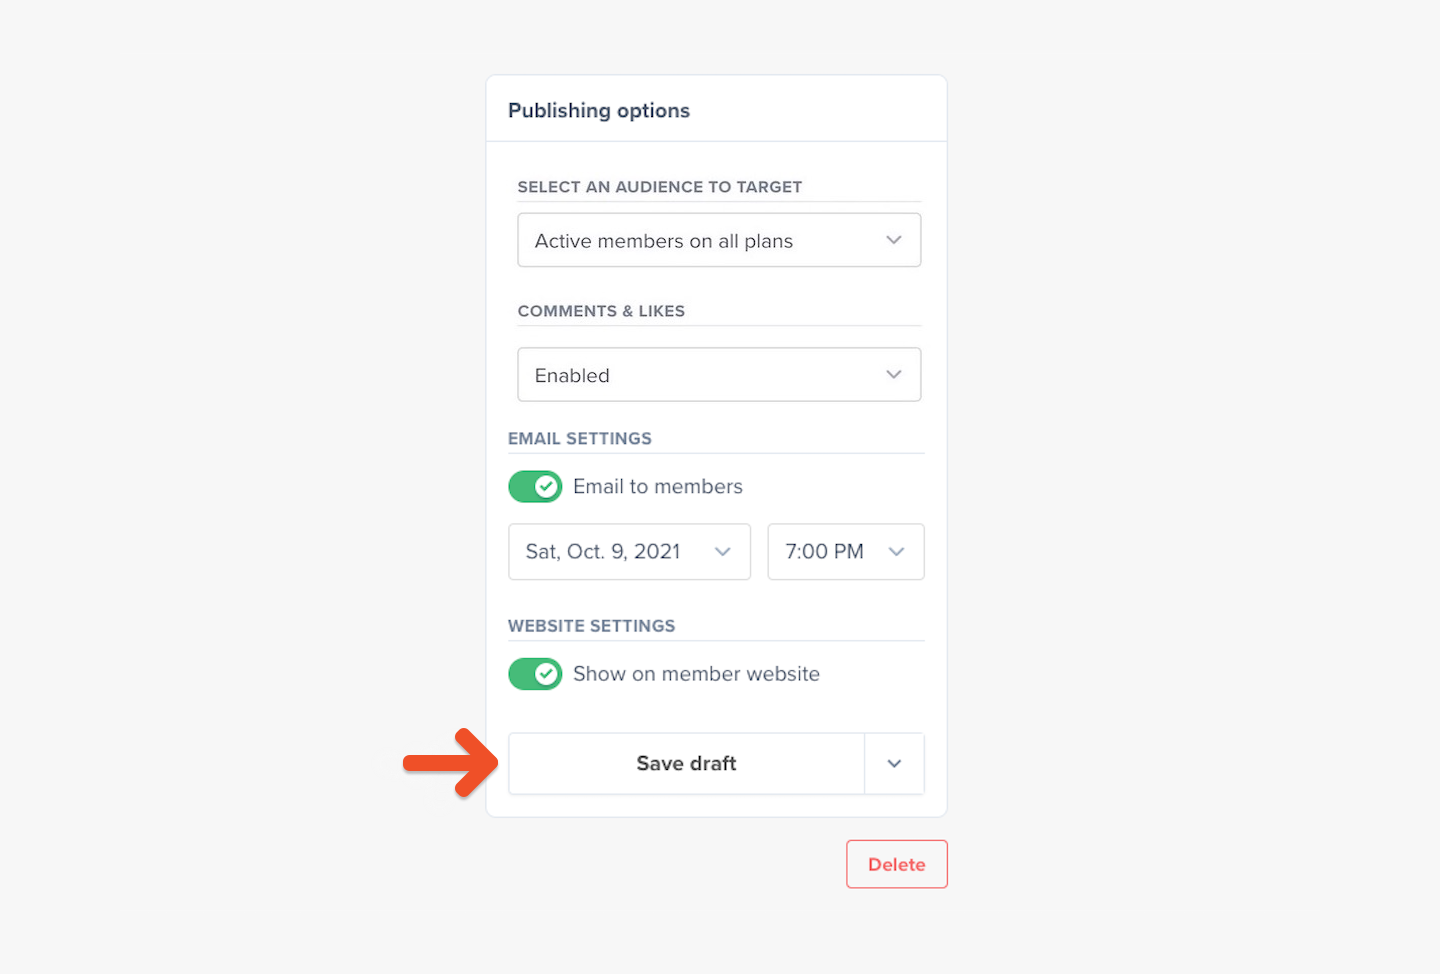
Select an audience to target
Your Posts can be sent out to members of all your plans, or only to members of selected plans.
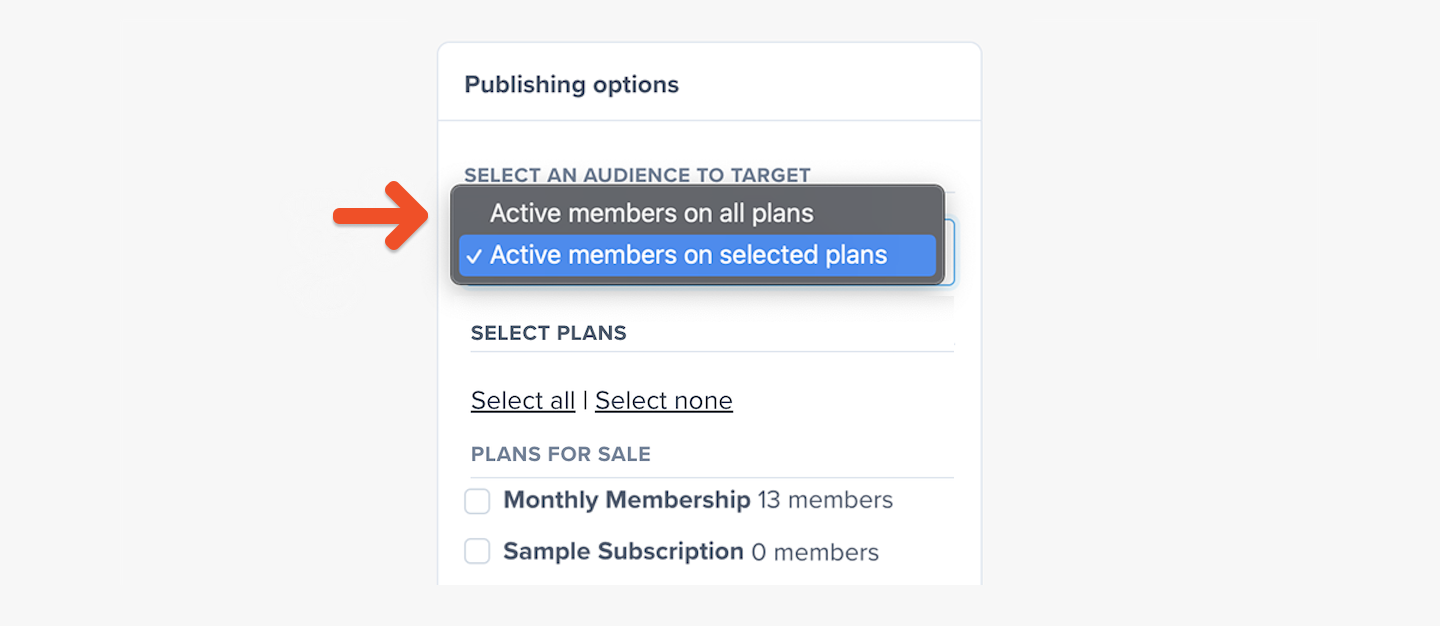
When you choose to target only members of selected plans, you can select which plans should be included.
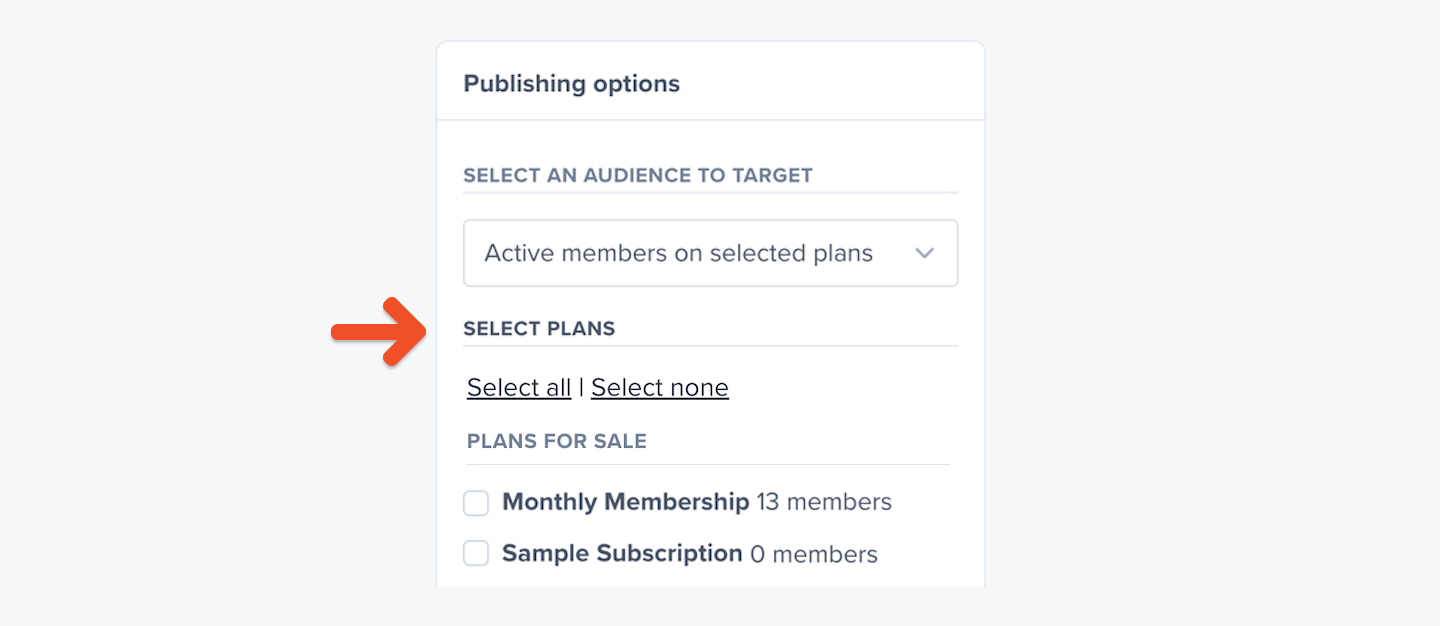
Note: All-access pass holders are included in the count of how many members will receive a message, so the number of recipients might be different than the number of subscribers in the selected Plans.
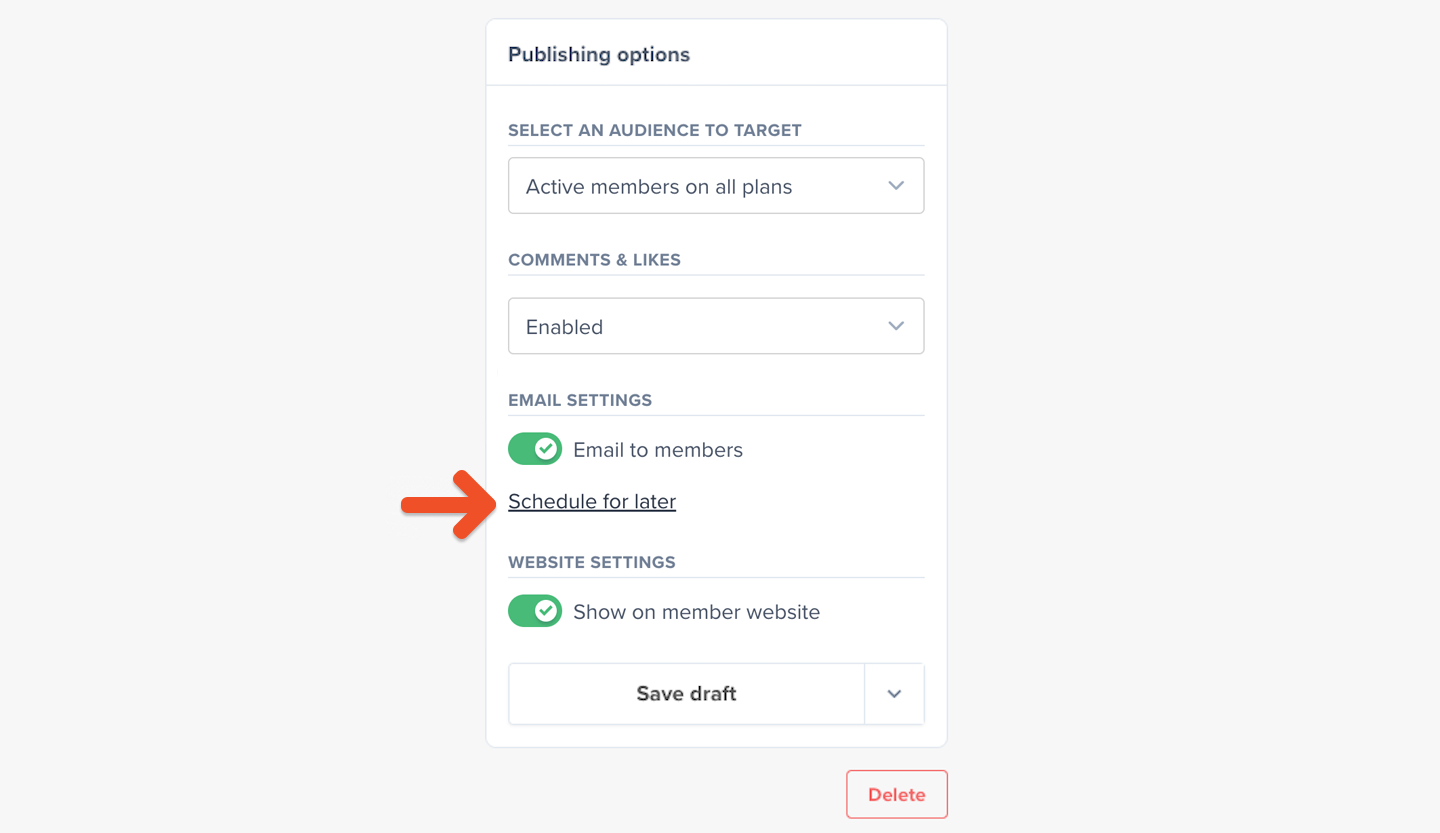
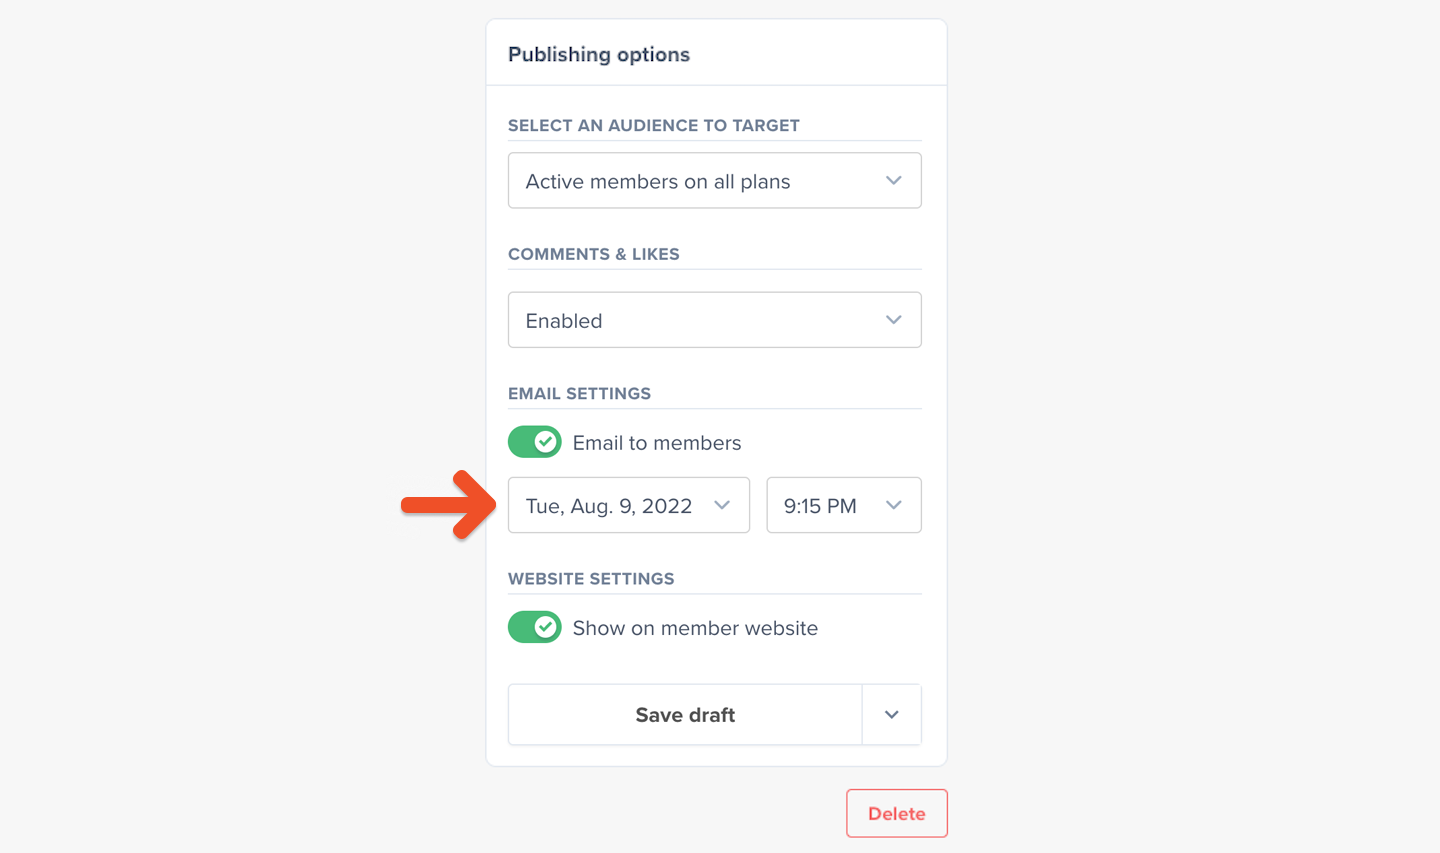
(Optional) Schedule the Post
You can schedule your Post to be published or sent sometime in the future. To do so, click Schedule for later and enter a date and time.
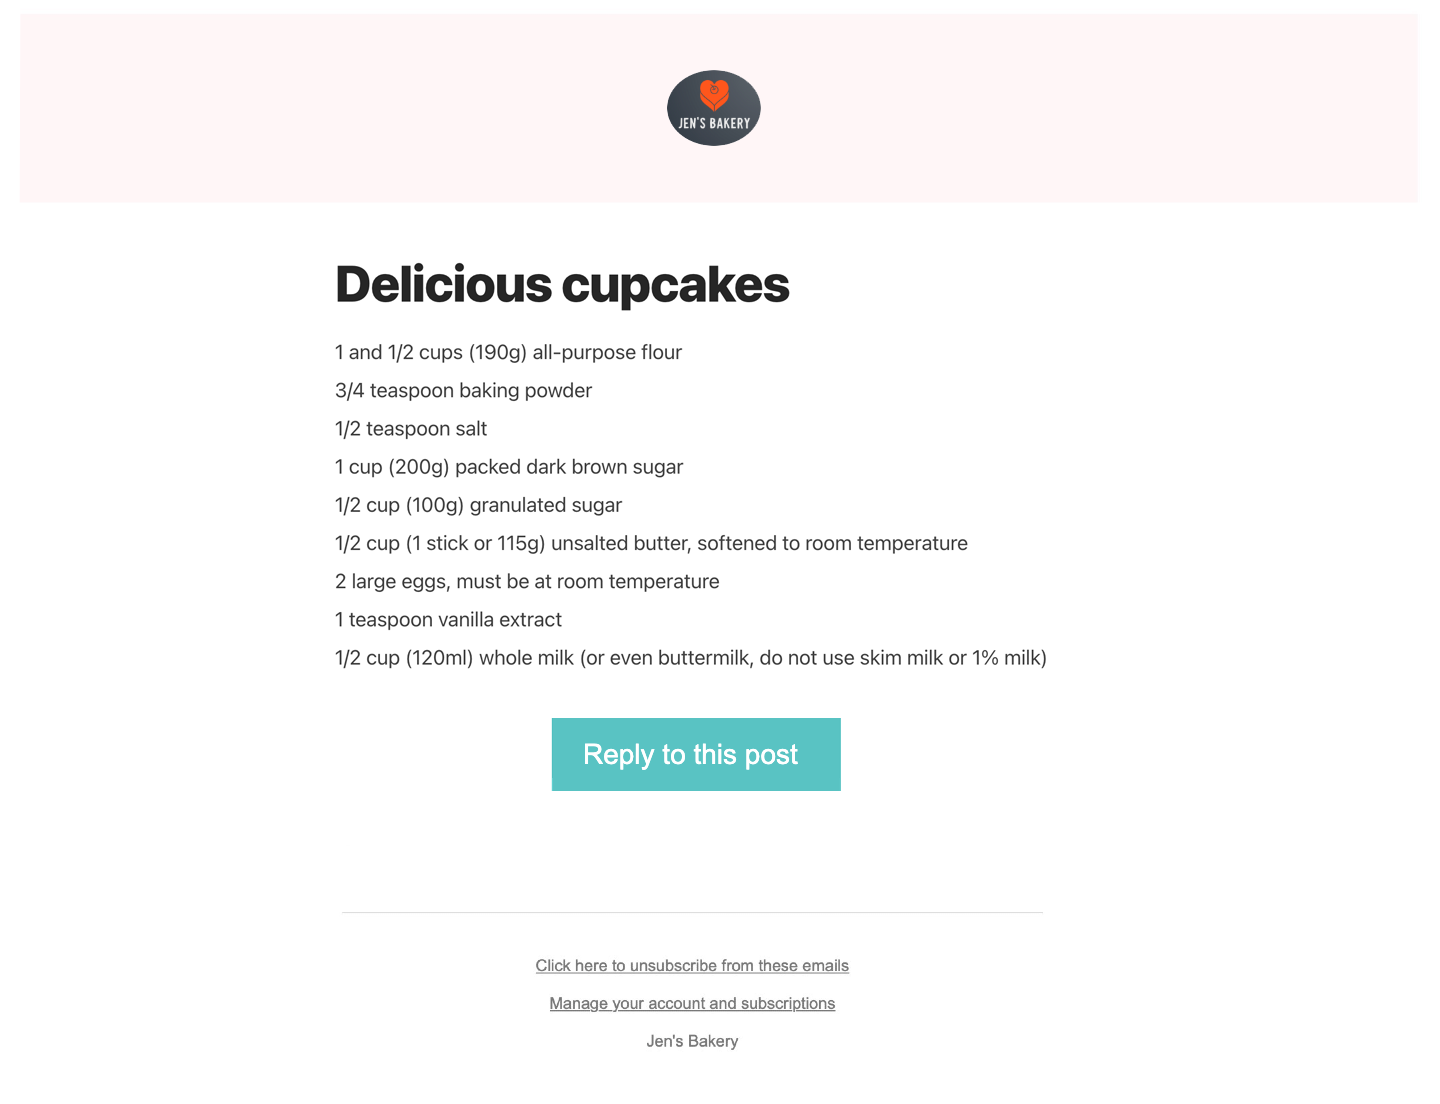
Customize your branding
Use our Visual Editor via Customize → Design to customize the background and button colors, and upload your logo.
These customizations will be applied to your newsletter messages and published Posts.
Learn more about customizing your branding.
Send your members-only newsletter
If you're not ready to publish your Post but would like to save your work, click Save draft.
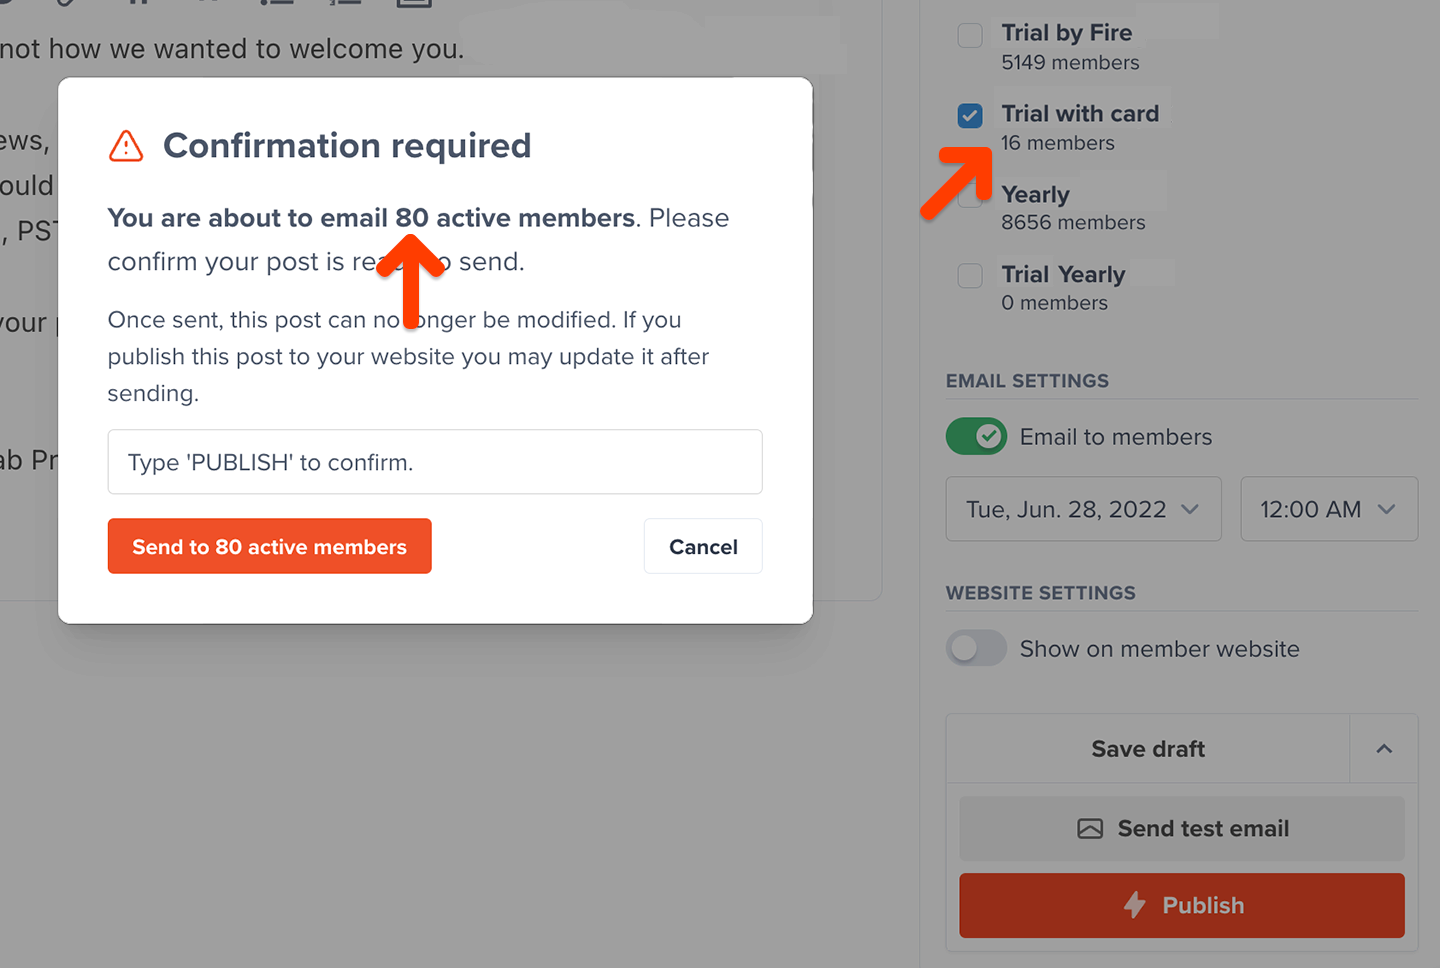
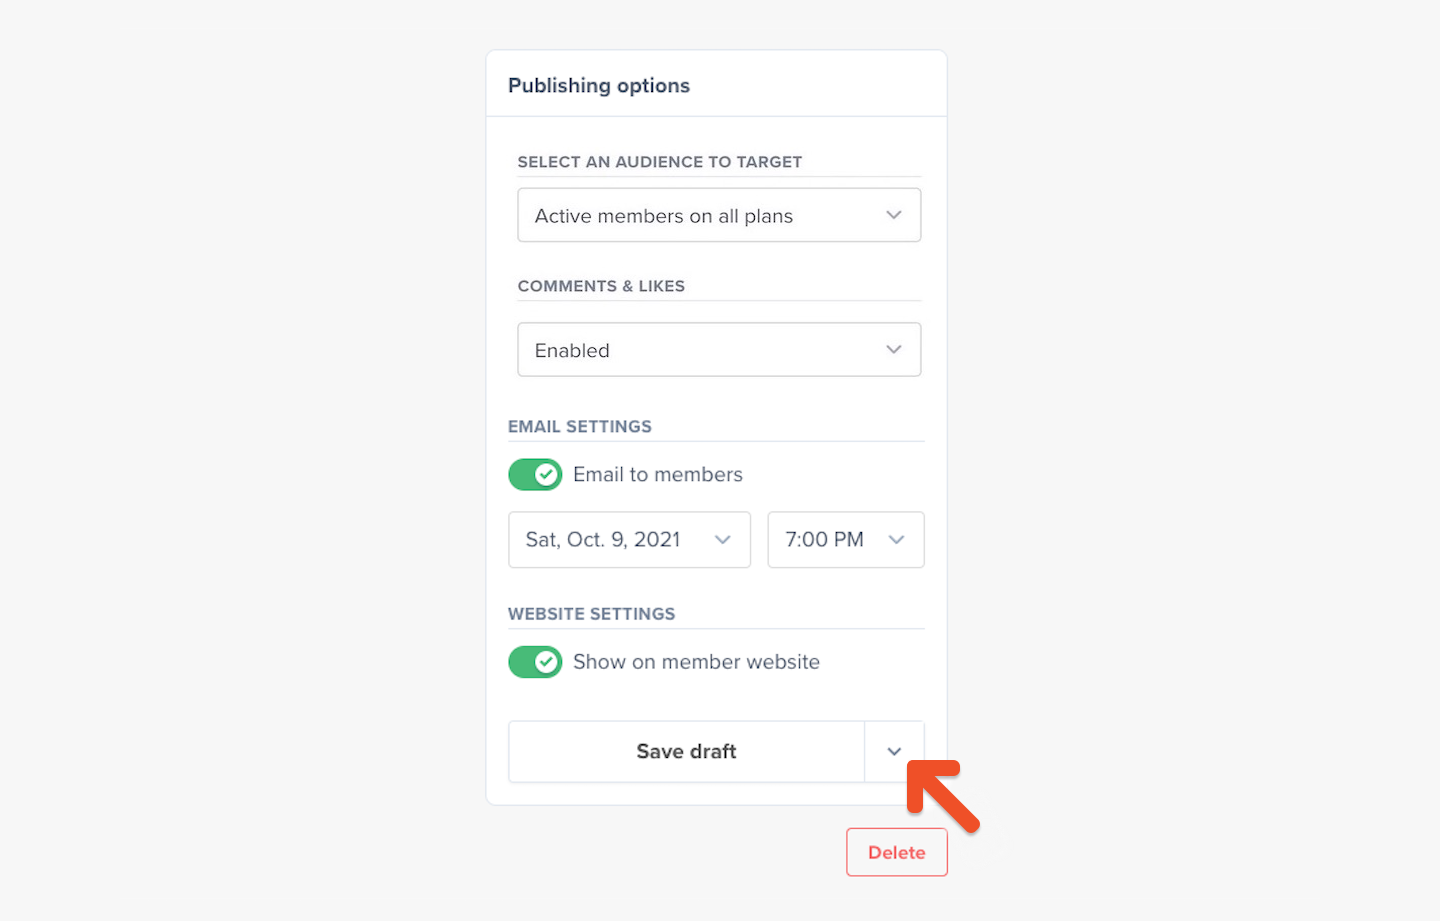
Once you're happy with your Post, click the downward arrow button to display the options for sending.
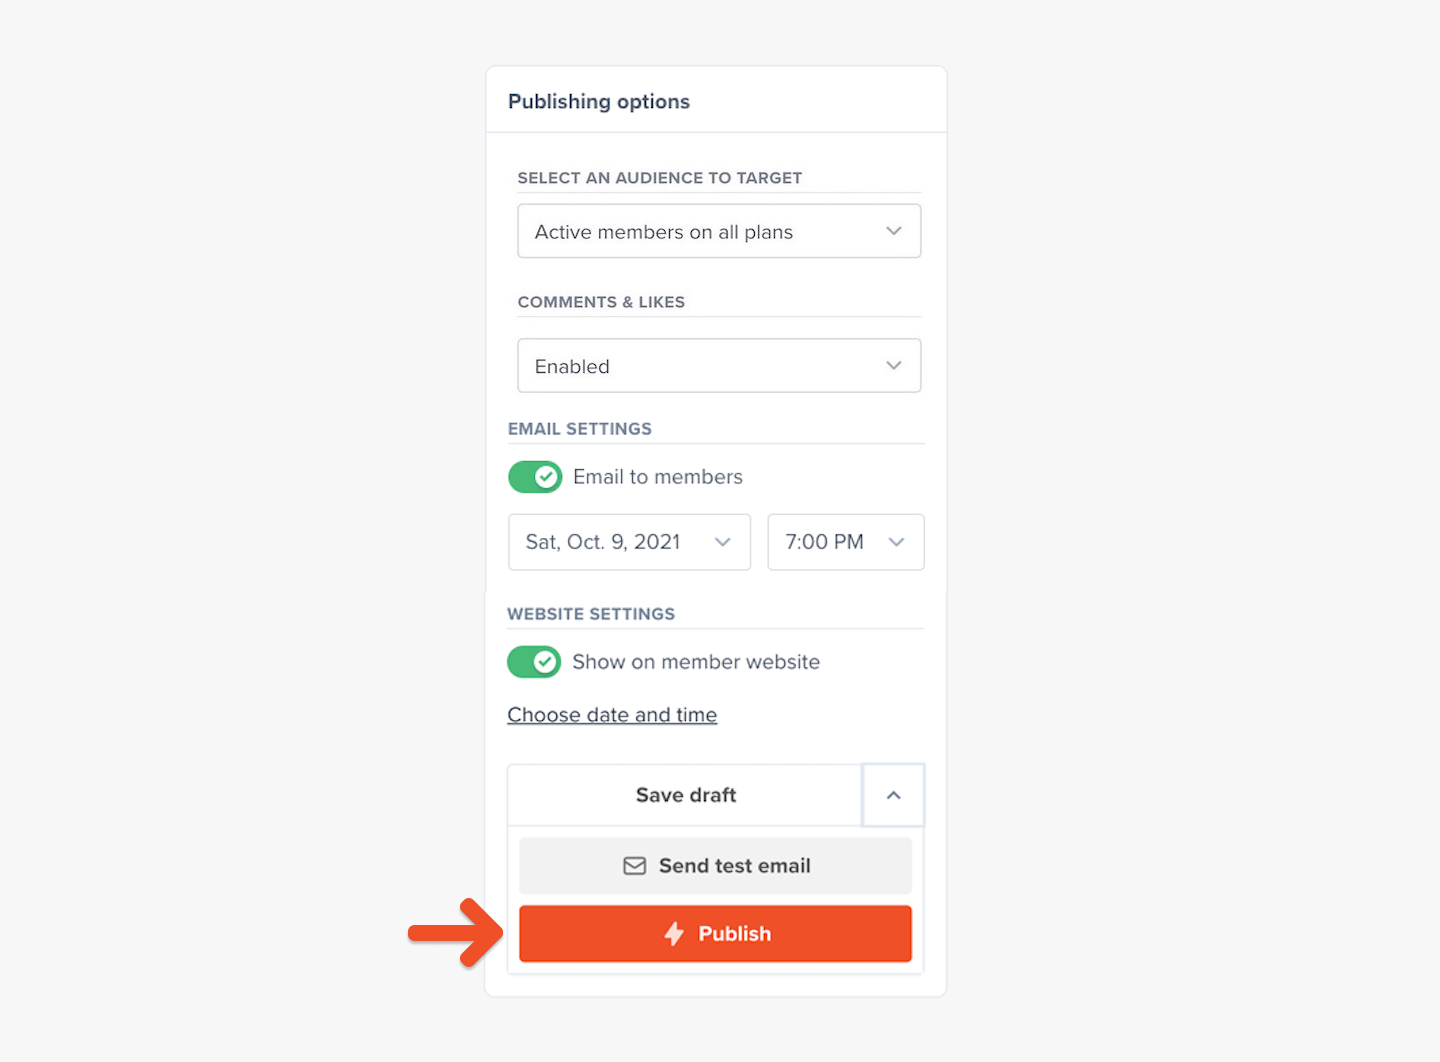
Before you publish the Post, click Send test email to see an accurate preview of what your members will see in their email inbox.

Once you're ready to send it, click Publish. You might be asked to type in the word "PUBLISH" (all uppercase) to confirm that you're sure you want to send the message.
You can send up to one email per day. Posts cannot be sent via email or scheduled while in test mode. Connect to Stripe to enable this setting.
(Optional) Publish messages to a Memberful-hosted website
Our Posts feature is two features in one. It allows you to:
- Send Posts via email — allowing you to send out a paid members-only newsletter.
- Publish Posts to a Memberful-hosted website — allowing you to offer paid members-only content on a simple website that's automatically created and hosted for you by Memberful.
You can choose to deliver your Posts via email, website, or both.

To publish your newsletter message to your Memberful-hosted website, simply enable the Show on member website switch.
Test the member experience
While your Memberful account is in test mode, you can use Stripe’s test credit cards to complete example member purchases and recreate their onboarding experience. Make sure to sign up with a different email address than the one associated with your website and Memberful admin accounts, as using the same email address can produce unexpected errors.
You can also view any published post, write comments, and delete abusive ones while you’re signed in to your Memberful dashboard as an admin. Select a Post and click View Post to get access. Learn more about moderating Post comments.
Additionally, you can use our Visual Editor via the Customize tab to see which features are customizable, how they interact, and what they’ll look like to your members across different views and devices.
Go live
When you’re ready to start processing orders, choose your currency and connect to your Stripe account via Account → Activate account. Please note that we will automatically delete all your test orders and member accounts when you switch to live payments.
Nice work connecting to Stripe! 🚀
Now you’re ready to start selling memberships to your audience. Here are a few ideas to make your launch a success:
- Announce the membership on your social media pages.
- Link to the membership sign-up page in your social media profiles and upload special banners for launch month.
- Send a membership-specific email blast and add a link to the membership signup page in your email signature.
- Host a livestream or post a video to announce the membership.